Using Laravel Herd whilst keeping Valet and PHP Monitor
Introduction
As a long time user of Laravel Valet I was a little reluctant to try out Herd including wondering what I would do with it Homebrew wise and its often used companion, PHP Monitor.
As it turns out you can keep both configurations and this may well be a very good idea.
Do a backup first!
I did a full system backup (using Carbon Copy Cloner) before starting and I’d recommend you do the same, you know, “just in case.”
Why keeping both setups is a good idea
Whilst Herd is an incredibly robust and simple tool to use it has one tiny minor setback if you require anything beyond a standard install. The PHP binaries are part and parcel of the package so let’s say you needed to add something beyond it’s bundled extensions, it would be a non trivial task to do so (but the list is extensive, see below.)
List of included PHP extensions
Bcmath, Bz2, Calendar, Ctype, Curl, Dba, DOM, Exif,Ffi, Fileinfo, Filter, Ftp, GD, Gmp, Iconv, Imagick, Intl, Mbstring, Mysqli, Opcache, Openssl, Pcntl, PDO, PDO_mysql, PDO_sqlite, Phar, Posix, Readline, Redis, Session, Shmop, Simplexml, SOAP, Sockets, Sodium, Sqlite3, Sysvmsg, Sysvsem, Sysvshm, Tokenizer, XML, XMLReader, XMLWriter, Zip & Zlib.Fortunately you can run both setups side by side leaving PHP Monitor deactivated, ready for if you need it later on.
Is it as good as Valet & PHP Monitor?
Short and simple, yes. Valet is used under the hood and the PHP implementation is as good as PHP Monitor. You can add PHP versions (7.4 to 8.2 as of writing), park, isolate and set individual sites to particular versions of PHP. All from one simple interface via the top menu bar and its preferences. For further information you can read the documentation which is short, easily digestible and will give you a clear picture of what’s going on.
TL;DR The simple version
- If using PHP Monitor, open Settings > General and uncheck the Startup: Start PHP Monitor at login box.
- Quit PHP Monitor.
- Fire up a Terminal and enter ‘
valet stop‘. - Download Herd, move binary to Applications Folder.
- Open Herd and follow the install instructions.
- Check the footer of your
.zshrcand edit if needed.
What to look for gallery
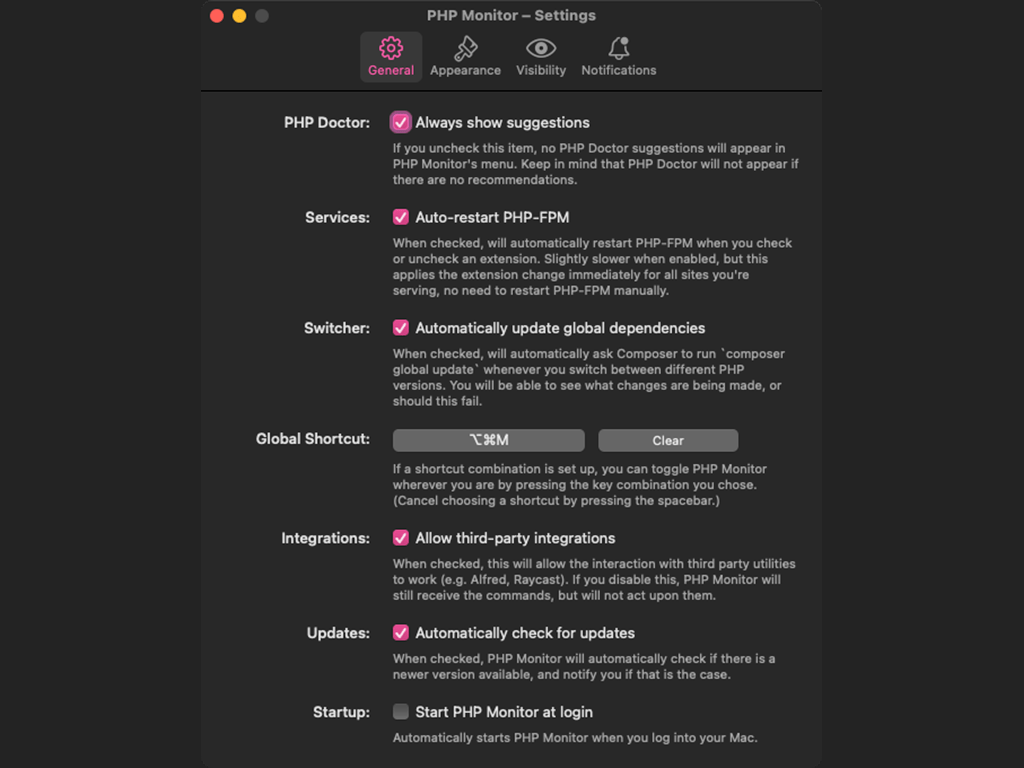
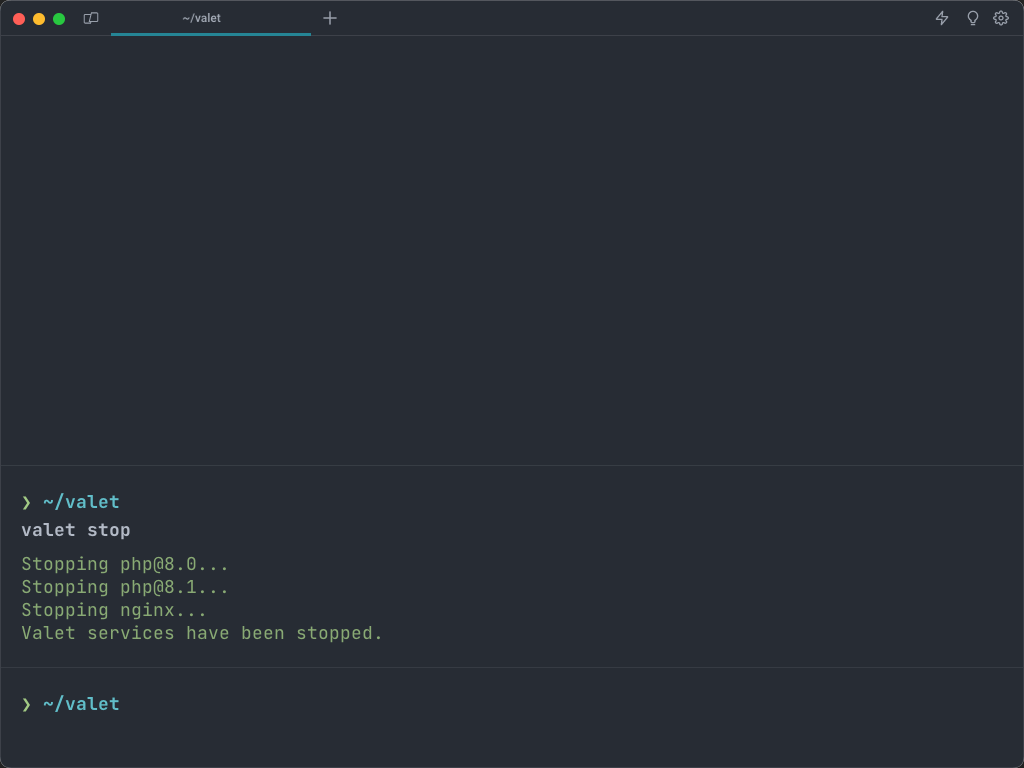
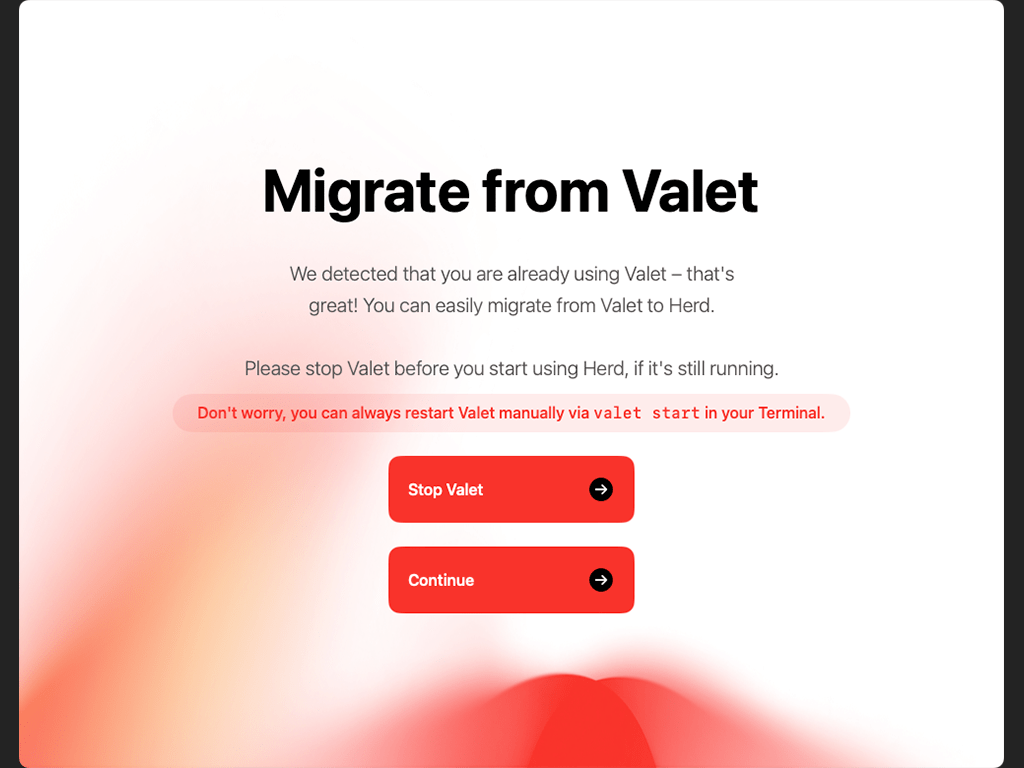

Image Index
Setup, the longer version
Step 01 – Make sure PHP Monitor does not open on system startup
We want to keep the application in case we need it at some point in the future. The one thing to do is ensure that it will not activate on system startup.
Go to Settings > General and uncheck the Startup: Start PHP Monitor at login box (See Image 1), you can then safely quit the application.
Step 02 – Stop Valet running services
Fire up your Terminal application of choice and enter the following command;
valet stopThis is a required step in the Herd install process and you might as well do it early to make sure it’s done. You will see something similar to Image 2, ensure it ends with ‘Valet services have been stopped‘.
Step 03 – Download and install Laravel Herd
If you have not already done so head to Herds homepage and download the package. Images 3 & 4 above are samples of the splash screens you’ll encounter, the whole process is streamlined and I encountered no difficulties.
If you want Herd to start at system startup check the Automatically launch Herd on system startup box (See Image 4) Don’t worry, if you forget this it can also be activated in its preferences (see below.)

Step 04 – Check your .zshrc file
In my .zshrc file I need to have certain entries at the bottom to properly ensure they are activated last. So I’m making you aware that after successfully completing the install process it will add the following lines (yours will look slightly different) at the bottom of the file.
# Herd injected PHP binary.
export PATH="/Users/barrd/Library/Application Support/Herd/bin/":$PATH
export PHP_INI_SCAN_DIR="/Users/barrd/Library/Application Support/Herd/config/php/":$PHP_INI_SCAN_DIR
I moved them to an appropriate area further up, saved the changes, then ran;
source ~/.zshrcStep 05 – Play, test and then do a restart
If all has gone well everything should be up and running smoothly. As a sanity check to see if Herd is actually running and not some weird hybrid, open a new tab, enter a .test URL of a site you do not currently have configured like;
https://my-test-example.testAnd you should get a Herd 404 page returned.

If you’ve gotten this far the last thing I’d suggest is to do a restart. Reason being, especially if this is a work machine you do not want “nasty surprises” cropping up after a reboot… on a work day… aarrgghhh. Be smart, do it now and recheck everything.
Final thoughts
The major relief, after the clean, fast and simple install is that for the most part I will have less Homebrew “OK what’s going to go wrong this time” after ‘brew update‘ traumas in my life, we could all do with that I think.
If you decide to give it a try I hope you’ll find it as easy to setup as I did and enjoy the benefits of this great bit of software.
// End of Article
Article Information
Further Reading
- Announcing Laravel Herd (beyondco.de)
- Carbon Copy Cloner Website (bombich.com)
- Homebrew Website (brew.sh)
- Laravel Herd Documentation (herd.laravel.com)
- Laravel Herd Website (herd.laravel.com)
- Laravel Valet Documentation (laravel.com)
About Dave A.K.A. 'barrd'