Edit the developer tools contextual menus in Vivaldi
Introduction
The Vivaldi User Agent is a strong and fairly recent contender in the ongoing “which browser is my favourite” debate. I downloaded it a while ago but never really got to grips with it, particularly from a Web Developer’s perspective.
Lately though, I’ve started giving it another go…
Tedious contextual menu setup
This article relates to an almost deal-breaker feature where inspecting an element was a tedious manoeuvre of right-clicking (for a contextual menu), sliding down to a submenu, then sliding across to select the Inspect menu item.
Given how often I do this on a daily basis the annoyance factor soon mounted up. The following explains how to edit the menus to a custom configuration.
Before and after editing the menu
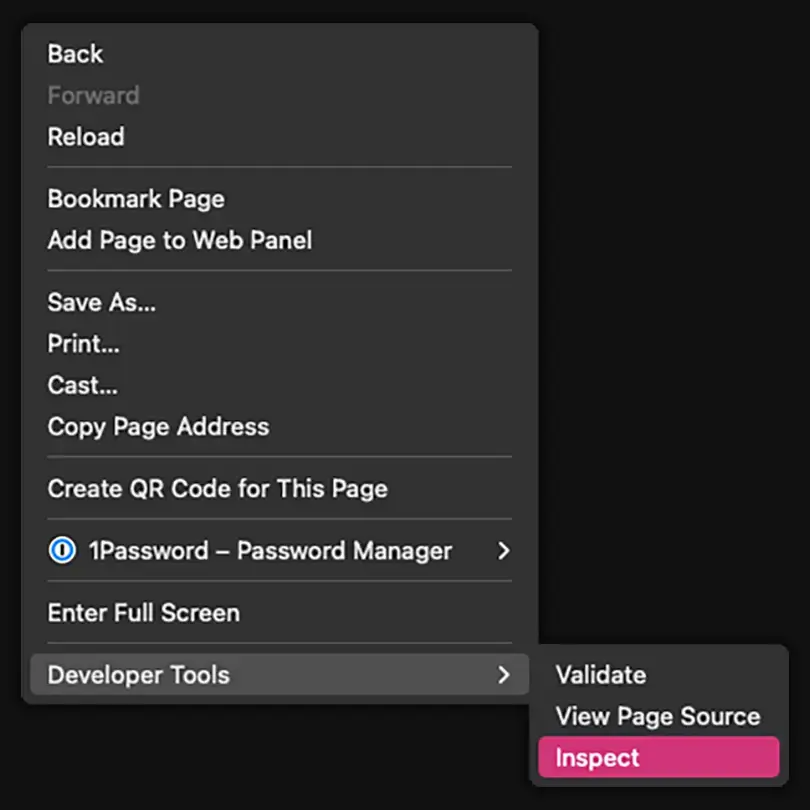
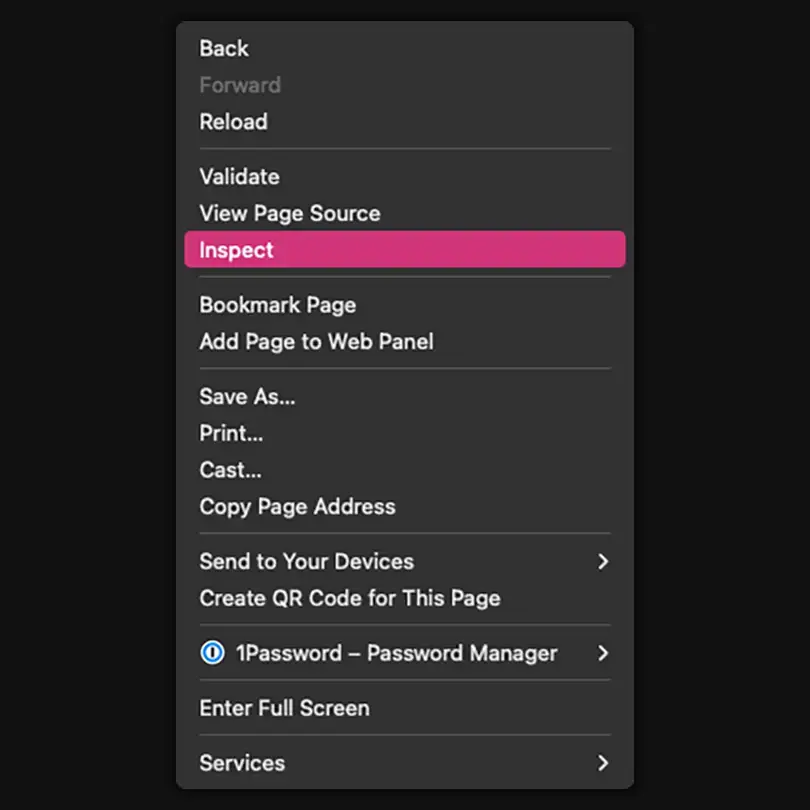
Image Index
The images above show what we will achieve in this article, from multi-move down to two steps. Perfect.
NOTE
Whilst we can remove the container submenu element, the items themselves remain bundled together;
Validate, View Page Source & Inspect.
Step 1. Locate the menu settings
Whilst there is documentation that covers this procedure it took me a while to figure it all out, including that there were multiple Developers Tools sections. I’ll start with the Page menu as that’s the quickest to test.
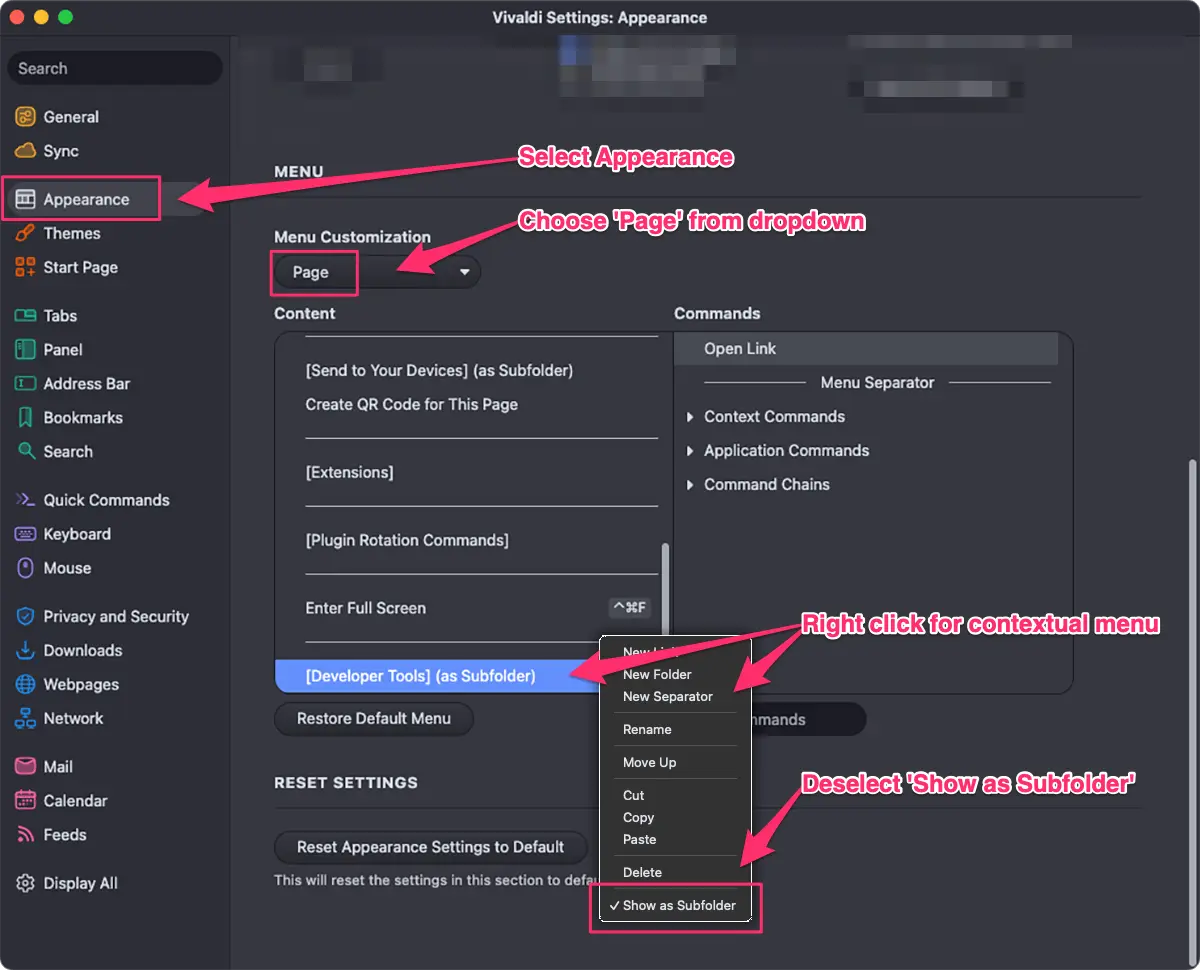
Procedure to remove subfolder
- Go to
Settings>Appearance - Scroll down to the
MenuSection - Select
Pagefrom the dropdown - Scroll to the bottom of the menu choices
- Right click
[Developer Tools] (as Subfolder) - Deselect
Show as Subfolder
Step 2. Drag-n-drop, add optional separator
As I personally use the contextual menu items Back & Reload even more than Inspect et al, I left them pride of place at the top.
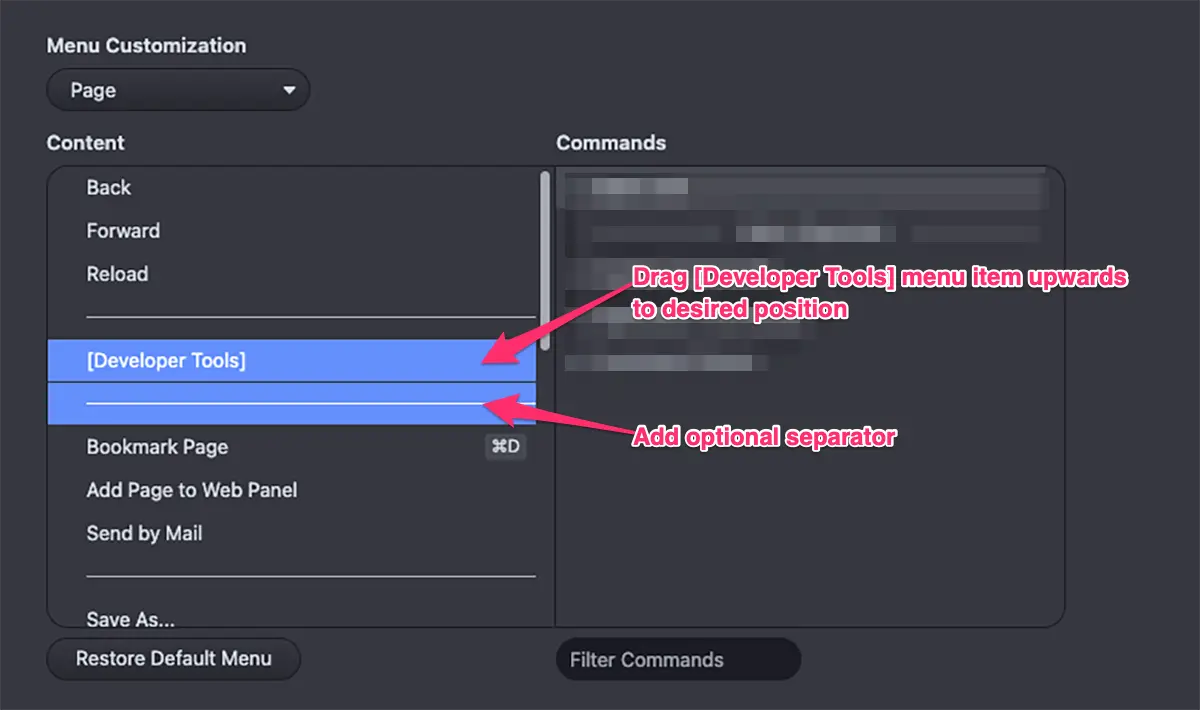
Procedure for menu items placement
- Select the
[Developer Tools]menu item and ‘drag’ to your desired position. Then ‘drop’ to place it there. - Optional. Add a separator below by selecting
[Developer Tools], right click for contextual menu and selectNew Separator
That’s it, job done for ‘Page’ – but there’s more…
You can now test your new setup on a webpage and make further edits as you see fit.
However, in order for this to work across all the contextual menus on offer you’ll need to do the same procedure for each of the following as found in the dropdown menu;
Audio and VideoImageLinkPageSelectionText Field
Each of these has a [Developer Tools] section inside of a submenu.
Final thoughts
There’s a lot to love about Vivaldi but there are some improvements that could be made to make it more Developer friendly. Using this technique removes one annoyance, there are others, but I’ll leave that for another post.
I also intend to write about other tips I have for configuring the settings to assist in the overwhelm that firing up Vivaldi for the first time instills. Till then, hope this article has helped.
// End of Article
Article Information
Further Reading
- Vivaldi Homepage (vivaldi.com)
- Customise Vivaldi Menus (help.vivaldi.com)
About Dave A.K.A. 'barrd'