Add .nvmrc file to automatically change node versions
Introduction
Rather than having to remember which version of node works with your project you can add a facility to automatically call ‘nvm use‘ in a directory that contains a .nvmrc file when you change directory (cd) into it.
Skip to CLI instructions
You can skip the following section if you’re comfortable using the Terminal A.K.A. CLI (Command Line Interface.)
Using a text editor instead of the terminal
What to look for gallery
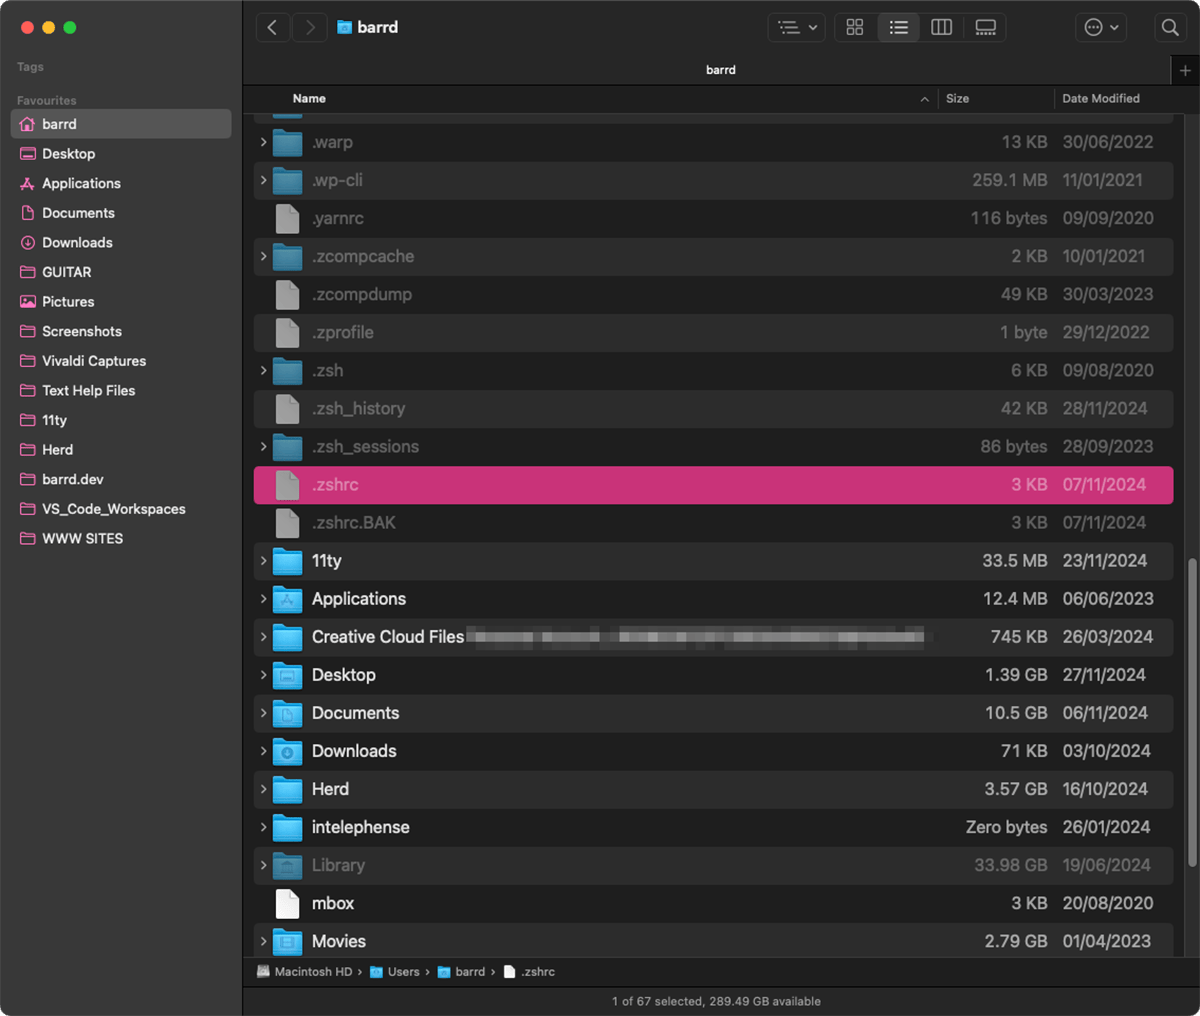

Image Index
Making the hidden… visible
Image 01 above shows dot-files, like .zshrc which are normally hidden are now viewable, thus easily editable by any text editor. This is achieved by focusing on the Finder Window and holding down the ⌘ + ⇧ + . (Command + Shift + Fullstop “.”) keys all together. This key-combo toggles their visibility on / off, so using the same keys again will make them ‘invisible’ again.
Open file with editor using contextual window
Image 02 shows the .zshrc file after it has been right-clicked to open the contextual menu. If it’s already configured you can open with the editor of your choice by hovering on “Open With” (VS Code shown) or choose “Open...” to select your favourite.
Step 01. Add code to .zshrc file
The first step is to add the following code to your .zshrc file located in your username root directory. You can either open using a text editor or in the Terminal;
nano ~/.zshrcAdd this near the bottom of the file to ensure that any required dependencies are already activated.
# Autoload NVM from project root
autoload -U add-zsh-hook
load-nvmrc() {
  [[ -a .nvmrc ]] || return
  local node_version="$(nvm version)"
  local nvmrc_path="$(nvm_find_nvmrc)"

  if [ -n "$nvmrc_path" ]; then
    local nvmrc_node_version=$(nvm version "$(cat "${nvmrc_path}")")

    if [ "$nvmrc_node_version" = "N/A" ]; then
      nvm install
    elif [ "$nvmrc_node_version" != "$node_version" ]; then
      nvm use
    fi
  elif [ "$node_version" != "$(nvm version default)" ]; then
    echo "Reverting to nvm default version"
    nvm use default
  fi
}
add-zsh-hook chpwd load-nvmrc
load-nvmrc
Once complete, in the Terminal type the following;
source ~/.zshrc… and hit return. This reloads your zsh config.
Step 02. Establishing the version you need to add
If you have everything working (i.e. with no errors) run the ‘node -v‘ command in the CLI at the root level of your project.
node -vYou’ll get something like vxx.xx.xx returned (e.g. v18.20.5), if you’re happy that this is the correct version needed you can move onto the next step.
Step 03. Create the .nvmrc file
Whilst still at the root level of the project, create the file by either opening a new document in your editor and pasting in the version or by using the CLI type;
node -v > .nvmrcThat will both create the file and pipe in the version of node as gleaned from the “node -v” command.
Step 04. Check the result
All being well, that’s it. To test, you can go down a directory level (cd ..) then go back in again and you should see something like the message below appear in the Terminal.
Found '/Users/barrd/11ty/eleventy-from-scratch/.nvmrc' with version <v18.20.5>
Now using node v18.20.5 (npm v10.8.2)
Final thoughts
I’ve been a bit spoilt using Herd for WordPress / PHP projects which has a GUI facility to manage node versions built in. As I delve further into SSG‘s and JamStack in general I can see I’ll need to find more methods to improve my workflow and help maintain my sanity. ;)
// End of Article
Article Information
Further Reading
- Node Homepage (nodejs.org)
- NVM Documentation (github.com)
About Dave A.K.A. 'barrd'